# SlidePack API Documentation
SlidePack API generates PowerPoint files from pptx templates and JSON data.
[See our service introduction](https://slidepack.io/)
# Getting Started
SlidePack is an HTTP API service, but you can give it a spin from your [Dashboard](https://slidepack.io/app).
This document will guide you through HTTP API usage.
You will need an API token to interact with SlidePack through the HTTP API.
If you don't have an API token, please sign up / sign in to your Dashboard and create one.
[Create your API token](https://slidepack.io/app)
# Next Up
Once you have your API token, proceed to [Quickstart](/md/guides/quickstart.md) to make your first API request.
---
# Table of Contents
## Guides
- [Quickstart](/md/guides/quickstart.md)
- [Template and Data](/md/guides/template-and-data.md)
- [API Limits](/md/guides/limits.md)
- [Render from Excel](/md/guides/excel.md)
## Reference
- [API Endpoints](/md/reference/endpoints.md)
- [data.json](/md/reference/data-json.md)
## Recipes
- [Repeating template slides](/md/recipes/001-repeat-slides/doc.md)
- [Text](/md/recipes/010-text/doc.md)
- [Text with options](/md/recipes/011-text-options/doc.md)
- [Text styles](/md/recipes/012-text-styles/doc.md)
- [Lists](/md/recipes/013-list/doc.md)
- [Tables](/md/recipes/020-table/doc.md)
- [Table with options](/md/recipes/021-table-options/doc.md)
- [Table auto-resize](/md/recipes/022-table-size/doc.md)
- [Table data bars](/md/recipes/023-table-databars/doc.md)
- [Charts](/md/recipes/030-chart/doc.md)
- [Dynamic chart series](/md/recipes/031-chart-dynamic-series/doc.md)
- [Chart data point styles](/md/recipes/032-chart-data-point-styles/doc.md)
- [Chart label interval](/md/recipes/033-chart-label-interval/doc.md)
- [Various types of charts](/md/recipes/034-charts/doc.md)
- [Scatter charts](/md/recipes/035-scatter-chart/doc.md)
- [Images](/md/recipes/040-image/doc.md)
- [Image scaling](/md/recipes/041-image-scaling/doc.md)
- [Video](/md/recipes/050-video/doc.md)
- [Changing theme colors](/md/recipes/060-theme/doc.md)
- [Analytics report](/md/recipes/100-analytics-report/doc.md)
- [Product catalog](/md/recipes/101-product-catalog/doc.md)
--------------------------------------------------
# Quickstart
This page will guide you through your first SlidePack render using the HTTP API.
You will need an API token to interact with the SlidePack API.
If you don't have one, please sign up / sign in to your Dashboard and create your token.
[Create your API token](https://slidepack.io/app)
### 1. Prepare your template and data
Input to SlidePack is a zip file that contains two things:
- `template.pptx` - A PowerPoint presentation with **\{placeholder}** s that will get replaced with the supplied data values.
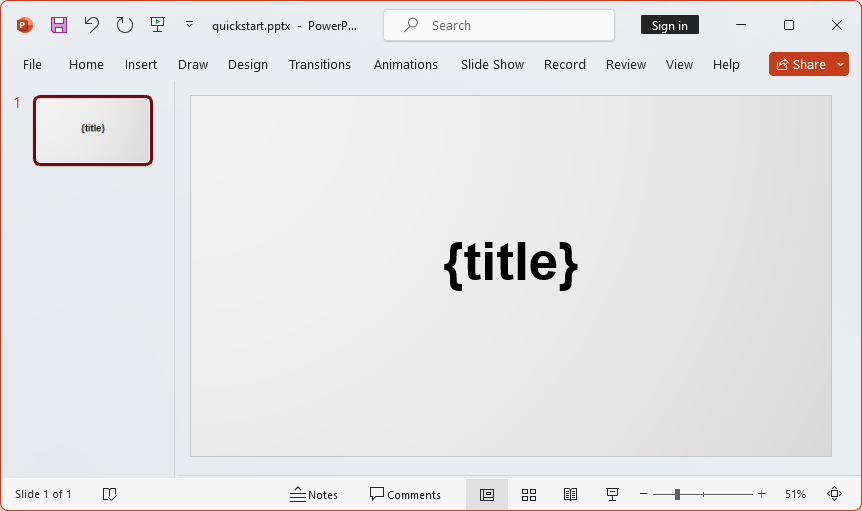
- `data.json` - Data to populate the template with. For the above template, a minimal data.json looks like:
```json
{
"slides": [
{
"template": 1,
"title": "Hello, World!"
}
]
}
```
Put these two files into a zip archive, and you are ready to start interacting with the API.
You can also download and try out one of the [recipes](/md/recipes/index.md).
### 2. Create a Session
A Session holds state for a single rendering session.
Request to create a session:
```shell
curl -X POST "https://slidepack.io/sessions" \
-H 'Authorization: Bearer {API_TOKEN}'
```
Example data returned from POST /sessions:
```json
{
"session": {
"uuid": "f0155f9f-d3f3-4fa9-9f8d-70f8fd2f9c36",
"created_at": "2020-08-13T13:14:32.000000Z",
"rendered_at": null,
"render_succeeded": null,
"render_slide_count": null,
"render_message": null
},
"upload": {
"action": "https://slidepack-api.s3.ap-northeast-1.amazonaws.com",
"method": "POST",
"enctype": "multipart/form-data",
"params": {
"acl": "private",
"key": "sessions/zip/f0155f9f-d3f3-4fa9-9f8d-70f8fd2f9c36.zip",
"Content-Type": "application/zip",
"X-Amz-Security-Token": "***",
"X-Amz-Credential": "***",
"X-Amz-Algorithm": "AWS4-HMAC-SHA256",
"X-Amz-Date": "20200813T131432Z",
"Policy": "***",
"X-Amz-Signature": "***"
}
}
}
```
The response includes parameters you need for the next step.
### 3. Upload input zip file
You'll be uploading your input zip file directly to SlidePack's S3 bucket.
Construct a POST request using values returned from the previous `POST /sessions` request.
- Enctype is `multipart/form-data`.
- POST URL should equal `upload.action`.
- All entries from `upload.params` should be included as form fields.
- `file` should be the last form field, pointing to your desired input file.
Example request to upload input file:
```shell
curl -X POST "https://slidepack-api.s3.ap-northeast-1.amazonaws.com/" \
-F "acl=private" \
-F "key=sessions/zip/{uuid}.zip" \
-F "Content-Type=application/zip" \
-F "X-Amz-Security-Token=***" \
-F "X-Amz-Credential=***" \
-F "X-Amz-Algorithm=AWS4-HMAC-SHA256" \
-F "X-Amz-Date=***" \
-F "Policy=***" \
-F "X-Amz-Signature=***" \
-F "file=@/path/to/your/data.zip"
```
If successful, you'll get a `204 No Content` response.
### 4. Render and download the output
We request a render of this session by POSTing to `/render`:
Example request to render the output:
```shell
curl -X POST "https://slidepack.io/sessions/{uuid}/render" \
-H 'Authorization: Bearer {API_TOKEN}'
```
Example render response:
```shell
{
"session": {
"uuid": "f0155f9f-d3f3-4fa9-9f8d-70f8fd2f9c36",
"created_at": "2020-08-13T13:14:32.000000Z",
"rendered_at": "2020-08-13T13:16:18.000000Z",
"render_succeeded": true,
"render_slide_count": 5,
"render_message": null
},
"download_url": "https://slidepack-api.s3.ap-northeast-1.amazonaws.com/..."
}
```
Access the `download_url` to retrieve your rendered output file:
```shell
curl "https://slidepack-api.s3.ap-northeast-1.amazonaws.com/..." -o output.pptx
```
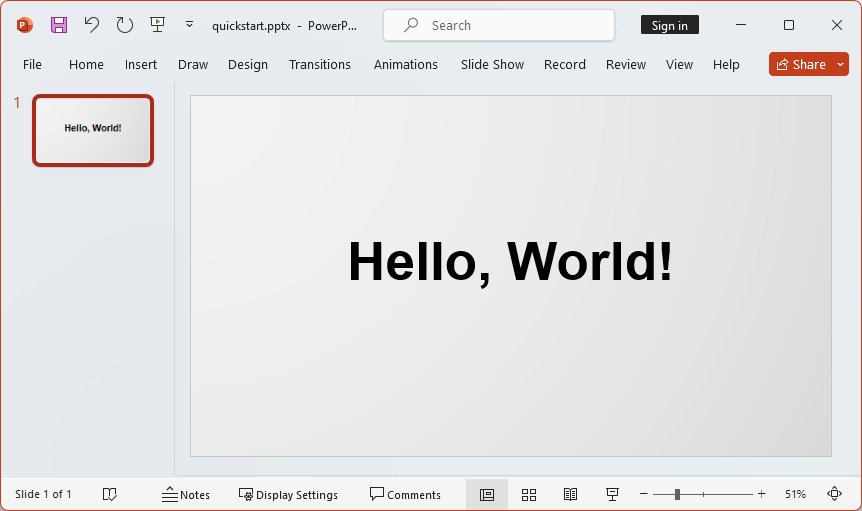
If you used the minimal example, this is what your output will look like:
### Next steps
- [Learn more about composing templates and data](/md/guides/template-and-data.md)
- [Browse the recipes to get an idea of what's possible with SlidePack](/md/recipes/index.md)
- [See the API endpoints reference](/md/reference/endpoints.md)
- [Take a look at code samples](https://github.com/qitar/slidepack-examples)
--------------------------------------------------
# Template and Data
SlidePack requires a zip archive as input. It consists of a template (in PPTX format), data (in JSON format),
and optionally, additional assets such as images.
```
input.zip
├─ template.pptx (required)
├─ data.json (required)
├─ :
└─ : (optional images, etc.)
```
### template.pptx
The template is much like a Pug or Mustache template (if you are familiar with those), except in PowerPoint's PPTX format.
This file should always be named `template.pptx`.
Template slides can contain placeholders indicated by **\{key}**.
Placeholders are replaced with values from your `data.json` that has the matching object **key**.
**template.pptx**

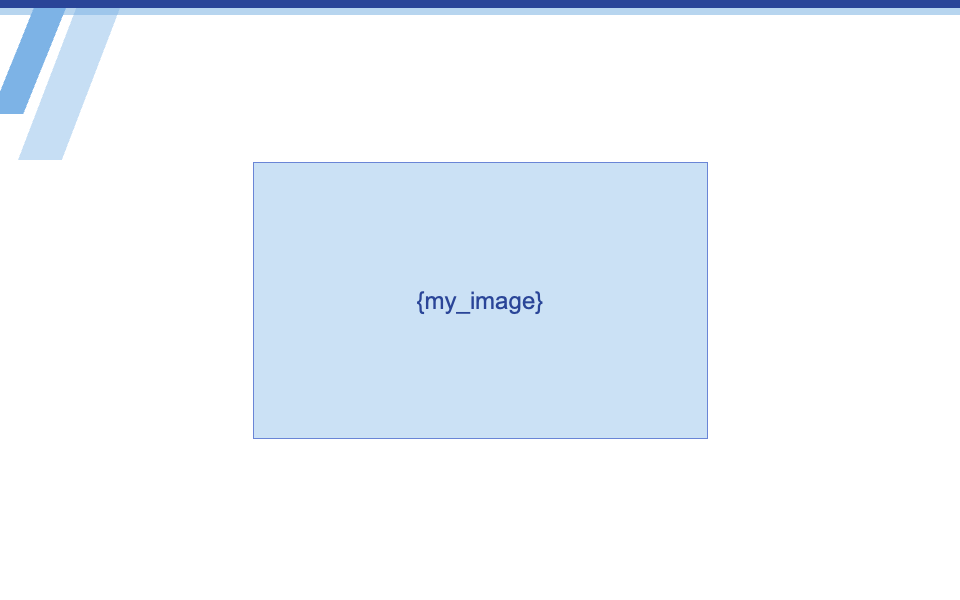
Different types of objects have specific ways of marking the target elements.
* **Text and bullet lists:** Occurrences of **\{key}** are replaced with the supplied string value.
* **Tables and charts:** Tables and charts with **alt text** matching the **key** are populated with the supplied data.
* **Images and videos:** SlidePack replaces shapes that contain **\{key}** with the supplied image or video.
### data.json
`data.json` holds the data to populate the template with, and also defines the composition of your output PPTX. This file should always be named `data.json`.
data.json:
```json
{
"slides": [
{
"template": 1,
"some_text": {
"type": "text",
"value": "Text to place"
},
"more_text": {
"type": "text",
"value": "More text to place"
}
},
{
"template": 2,
"my_image": {
"type": "image",
"src": "pics/client_logo.png"
}
},
{
"template": 2,
"my_image": {
"type": "image",
"src": "pics/our_logo.png"
}
}
]
}
```
The [top-level](/md/reference/data-json.md#root) `slides` array defines the list of slides that should compose the generated output.
In this example, the output will have three slides in total: one slide based on template slide no.1, followed by two slides based on template slide no.2.
Each [slide object](/md/reference/data-json.md#slide) requires a `"template":` number, designating which template slide to use.
This is followed by key-value entries that provide data objects for each **key** in the template slide.
Data objects include a `type` property to signify what kind of object it represents (e.g. `text`, `image`)
followed by data content and additional options.
For a comprehensive list of supported objects, along with their required properties and options, see the [data.json reference](/md/reference/data-json.md).
### Authoring tips
* Text and shape styles (like font size, colors) used in the template are kept for your output, but you can override some of them by specifying options in your `data.json`.
* SlidePack requires valid JSON - make sure there are no trailing commas in lists and objects.
--------------------------------------------------
# API Limits
### Plan rendering limits
Usage is subject to your [plan quota](https://slidepack.io/en/pricing),
defined by the number of rendered slides during the current billing cycle.
Requests that try to render slides past your plan quota will count towards your pay-as-you-go billing.
You will never be charged if you are on the Free plan. Once you reach your 50 slides per month limit,
you will not be able to request any more renders.
You can check your usage and limits in your [Dashboard > Billing](https://slidepack.io/app/billing).
### Other usage limitations
| Title | Limit | Notes |
|-------|-------|-------|
| Rate limit | 600 requests/minute | |
| Session expires in | 24 hours | Only one unrendered session is kept at a time regardless of this expiry. |
| Zip upload max size | 50MB | |
| Upload URL expires in | 60 minutes | Can be reissued as long as the session hasn't expired. |
| Download URL expires in | 5 minutes | Can be reissued as long as the session hasn't expired. |
--------------------------------------------------
# Render from Excel
This feature lets you use SlidePack easily with a combination of PowerPoint templates and Excel data, without any coding required.
Uploading different Excel data files to a single template will let you generate similar slide decks quickly.
Template format differs from the API.
### Usage
Create a PowerPoint presentation to use as a template, and upload it at
[Render from Excel](https://slidepack.io/app/excel) in your SlidePack Dashboard.
Then create and upload an Excel file that holds the desired data values.
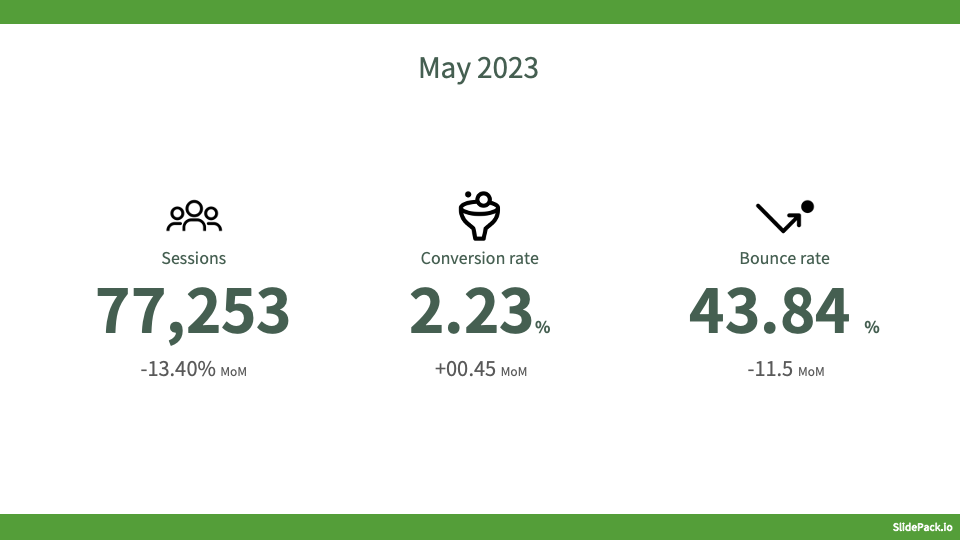
This will generate a new PowerPoint file with your data embedded, ready for download.
### Creating your template and data files
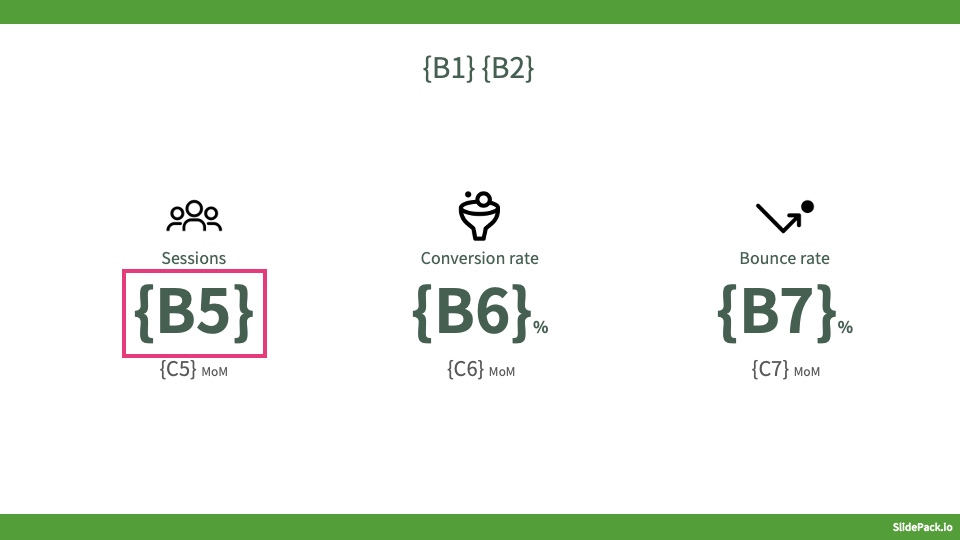
Insert placeholders in your PowerPoint template that refer to Excel cell coordinates, such as `{A1}` or `{B5}`.
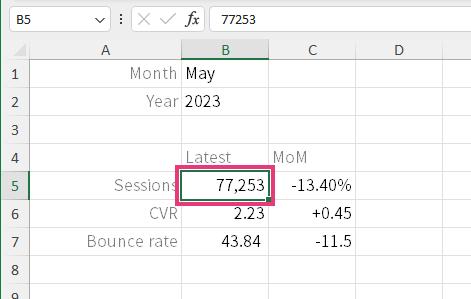
Make sure those cells in your Excel file have the desired values.
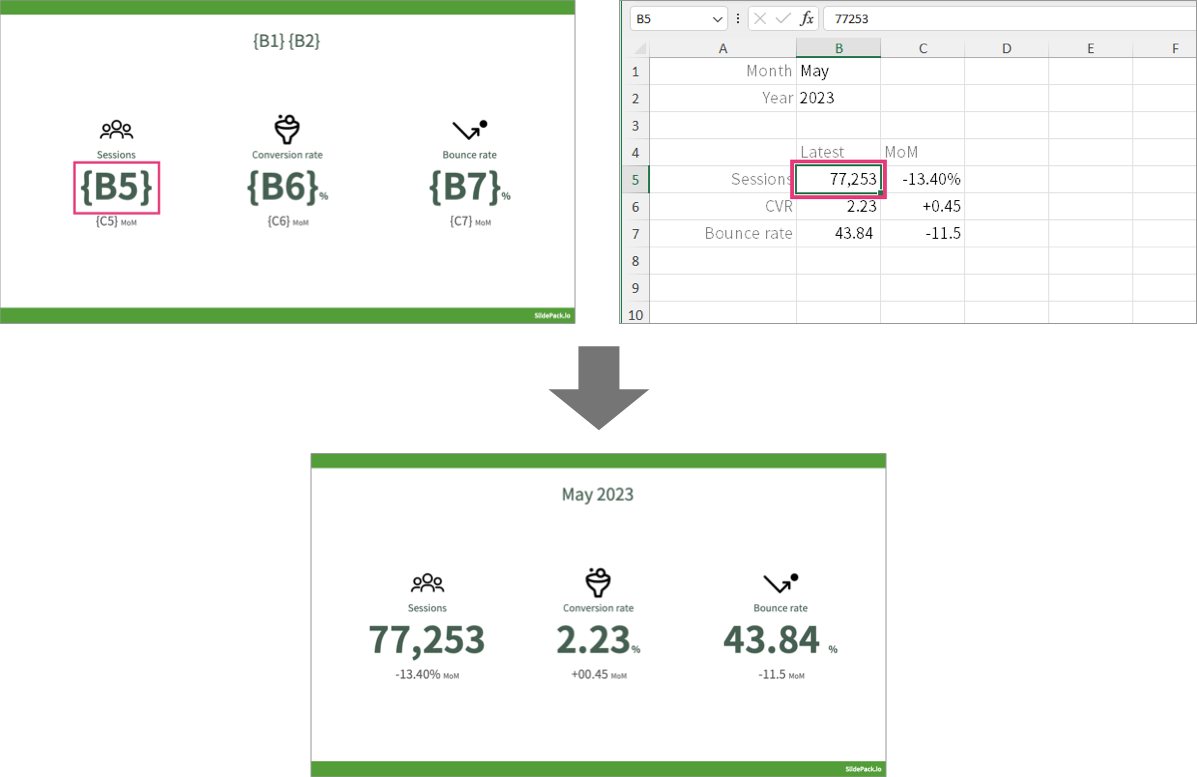
See below for a detailed description of all supported syntax and features.
---------------------------------------------------------------------
## Placing text {{ id: 'text' }}
### PowerPoint template
Insert placeholders that refer to Excel cell coordinates you want to pull values from, surrounded by curly braces. For example: `{B5}`.
**template.pptx**
### Excel workbook
Place desired values in the cells you referred to.
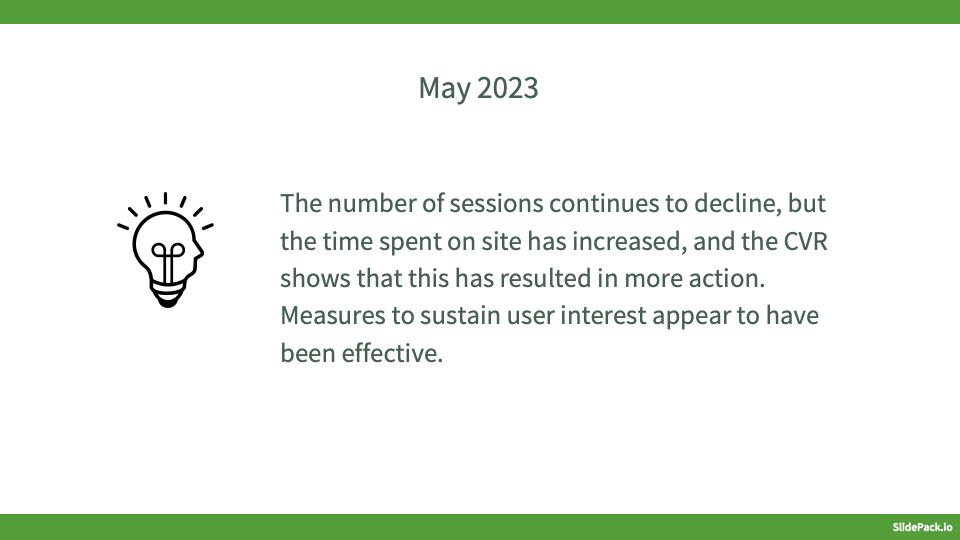
### Render result
**output.pptx**
## Placing text from a specific worksheet {{ id: 'text-from-sheet' }}
### PowerPoint template
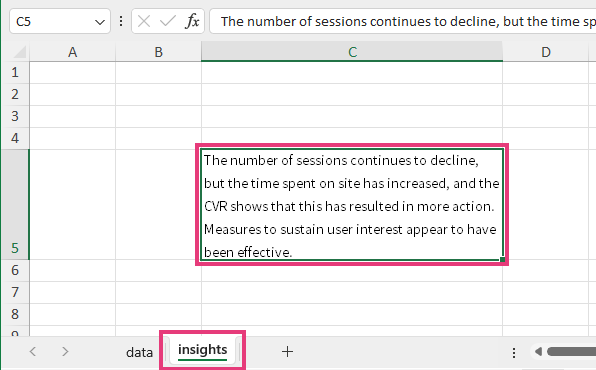
Insert placeholders that refer to the Excel worksheet name and cell coordinates, surrounded by curly braces, For example: `{SheetName:B5}`.
For example, if you want to get the value of cell C5 in the worksheet named "summary", you would write `{summary:C5}`.
**template.pptx**
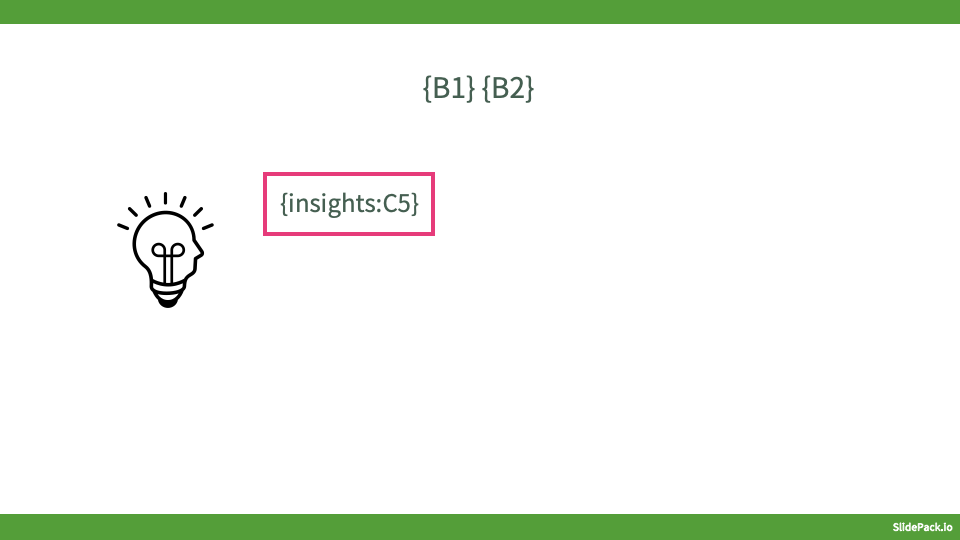
Note that you can omit the worksheet name for the first sheet. In this example, `{A1}` and `{data:A1}` are equivalent.
### Excel data
Fill the cells you referred to with the desired values.
### Render result
**output.pptx**
## Populating tables {{ id: 'table' }}
### PowerPoint template
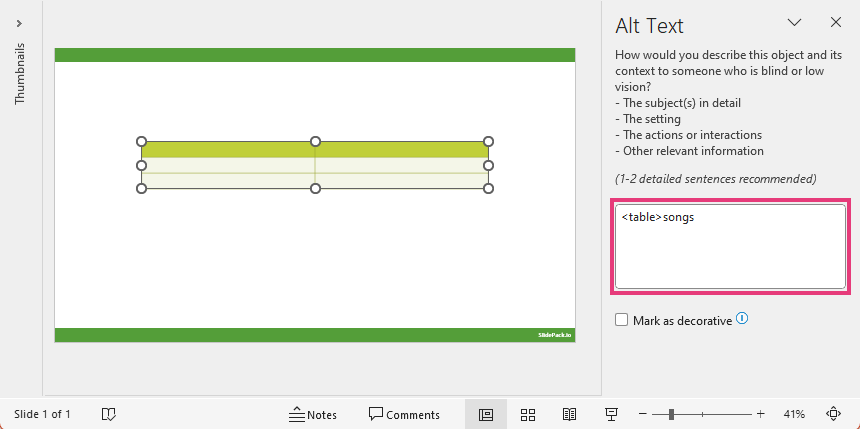
Insert a table and set a table name as its alt text.
The table name can be anything you like, but should start with ``. For example, `songs`.
(Right-click a table in PowerPoint and select **View alt text** to edit the alt text.)
**template.pptx**
### Excel workbook
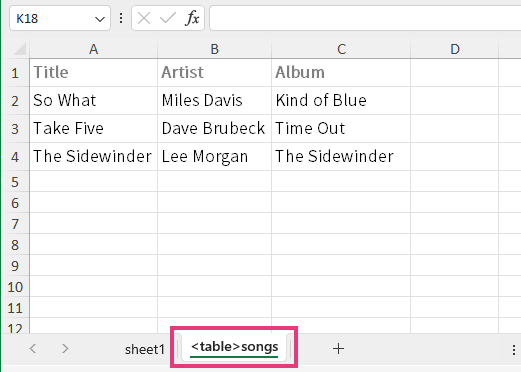
Create a new worksheet and fill it with the table data. The worksheet name should be the same as the table name (alt text).
### Render result
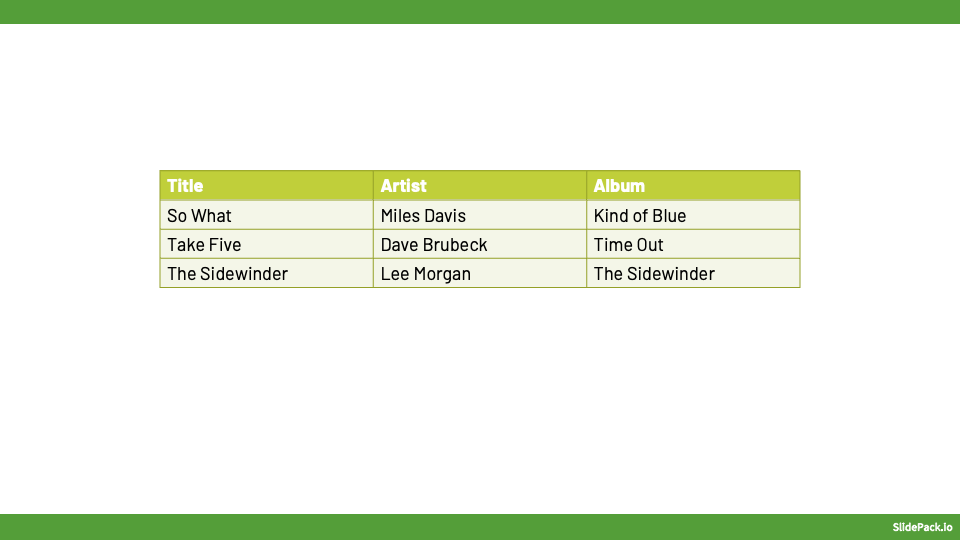
The number of rows and columns in the table will be adjusted to accommodate the data.
**output.pptx**
## Populating charts {{ id: 'chart' }}
### PowerPoint template
Insert a chart and set a chart name as its alt text.
The chart name can be anything you like, but should start with ``. For example, `sales`.
(Right-click a chart in PowerPoint and select **Edit alt text** to edit the alt text.)
**template.pptx**
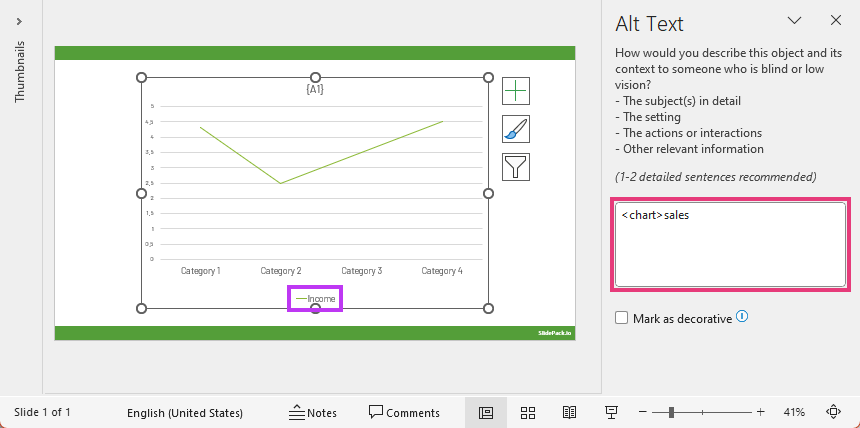
Chart values do not matter — they will be overwritten by the Excel data.
### Excel workbook
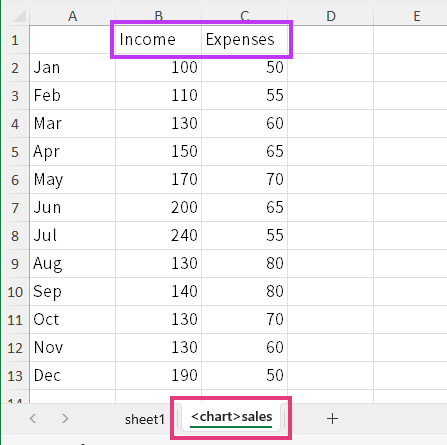
Create a new worksheet and fill it with the chart data. The worksheet name should be the same as the chart name (alt text).
Categories should be in column A. Series names should be in row 1.
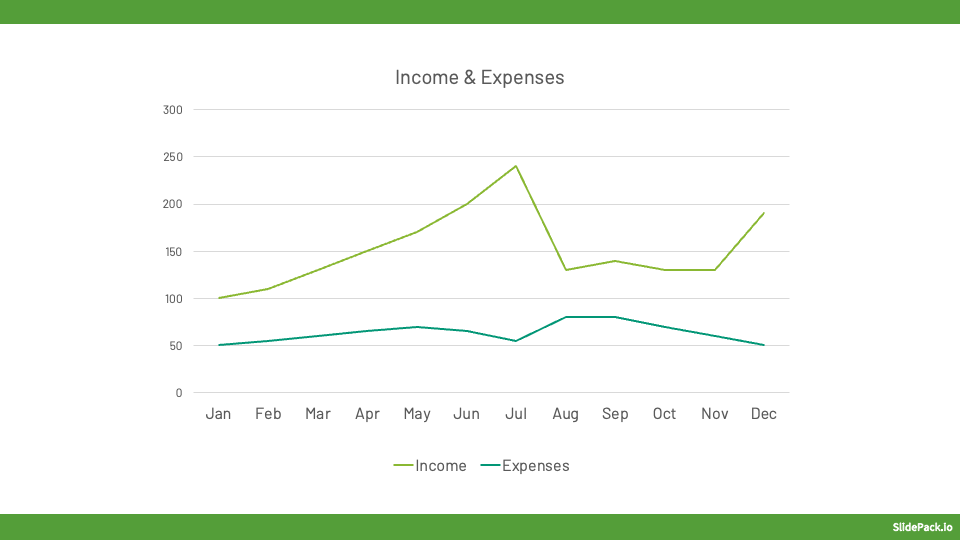
Series with corresponding names in the template will be overwritten. New series will be added.
### Render results
The number of series in the chart will be adjusted to accommodate the data. Colors for newly added series will be set automatically by PowerPoint.
**output.pptx**
## Placing images and videos {{ id: 'image' }}
### PowerPoint template
Place a shape where you want your image or video to be.
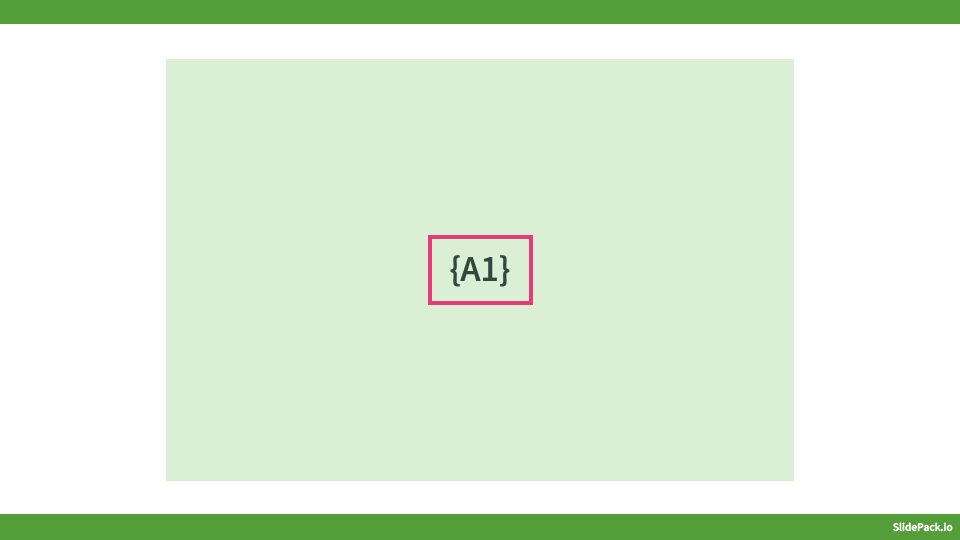
In it, insert text that refers to Excel cell coordinates, surrounded by curly braces. For example: `{B5}`.
You can optionally specify a worksheet name, like `{Sheet3:B5}`.
**template.pptx**
### Excel workbook
In the cell you referred to, place a URL to your image, prefixed with ``.
For example: `https://source.unsplash.com/tG36rvCeqng/720x480`.
Supported formats are `jpg`, `jpeg`, `gif`, and `png`.
For videos, use `